Saltcorner
By Bob Goemans
By Bob Goemans

After almost 50 years in the marine hobby, which included a wide diversity of aquarium systems, my decision to purchase this product was based on several reasons. The first was that I've had several Red Sea aquarium systems over the past many years, all consisting of quality material and having excellent system engineering. Second, the time had come to move my much older Red Sea system toward one with updated technology. And third, now being late 2024, Red Sea had moved into what I like to call the 'AI' stage of aquarium keeping by offering what is called 'Smart' equipment! And even though there are other forms of smart equipment on the market, theirs can all be integrated into 'their' app called ReefBeat.
As to this 'Product Review,' it's solely about the effort put forth to get the unit: cabinet, aquarium and its equipment to the fill stage, yet no further. Therefore, this is Part 1 of a two-part review. Part 2 will detail its actual filling and setup/operation of its ReefWave pumps, ReefCan, DC return and protein skimmer pumps, ATO unit, ReefMat, LED lights, and possibly, ReefBeat itself. Stay tuned!
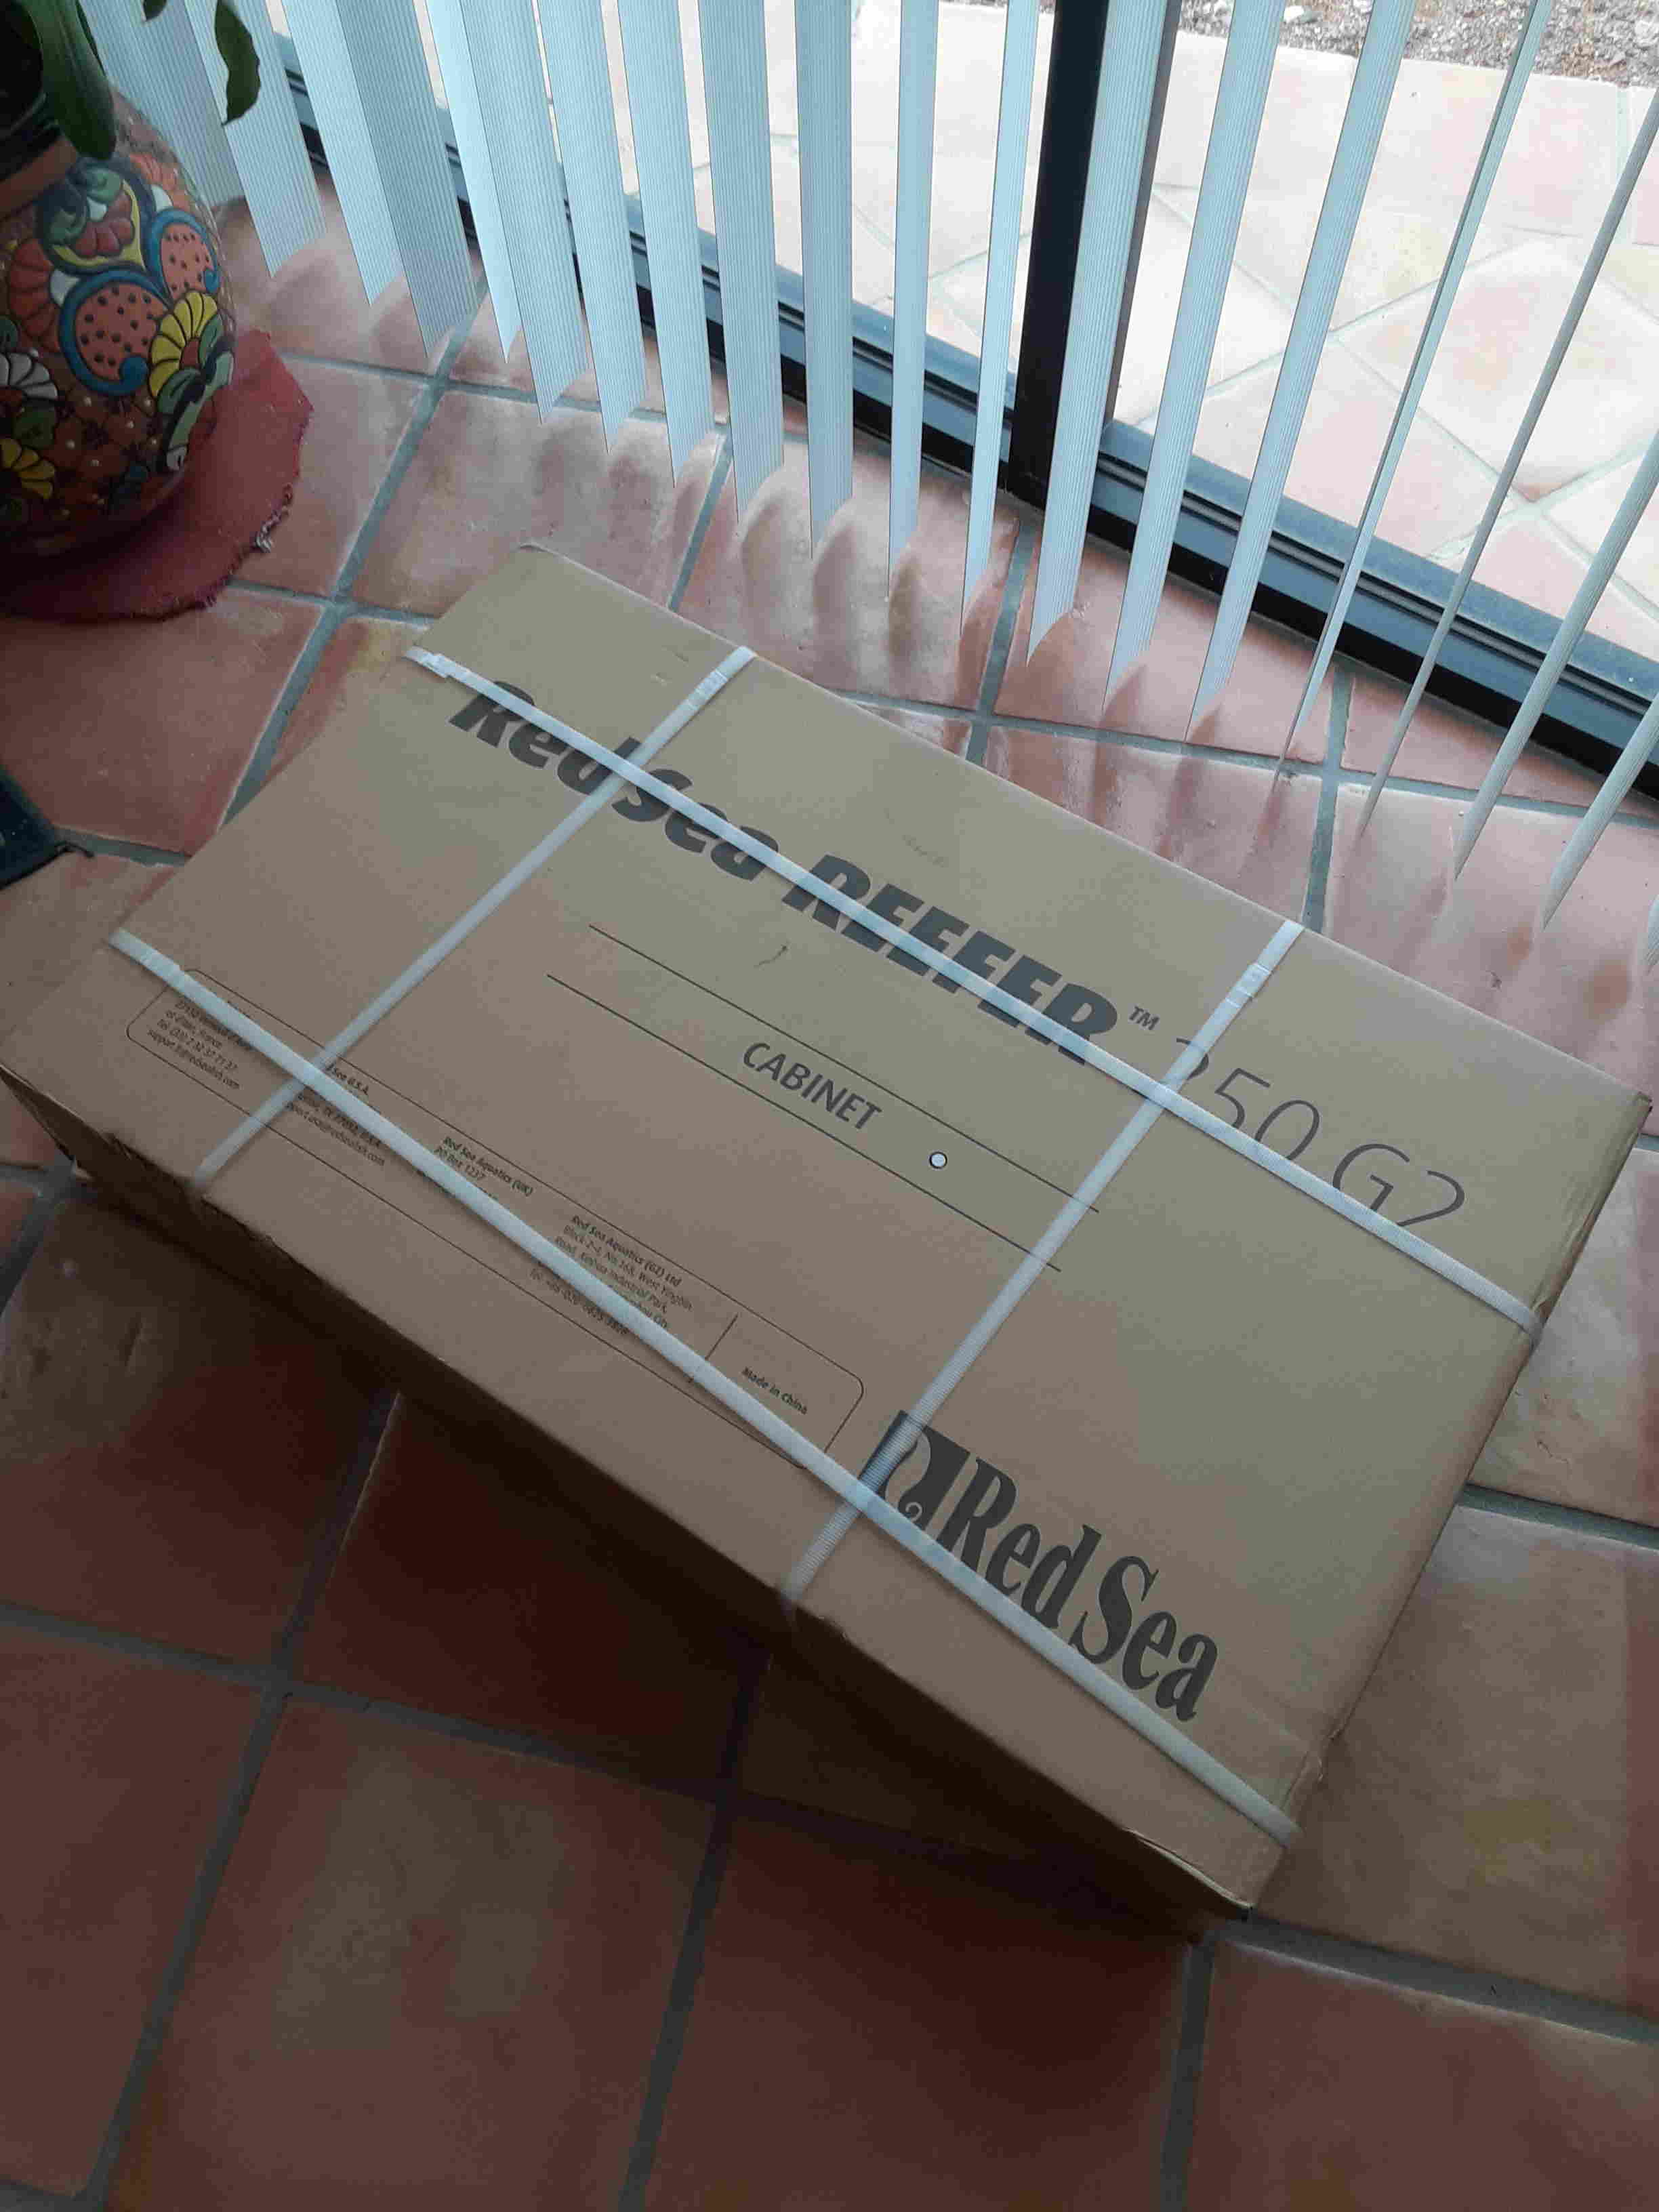
To launch Part 1, when the system arrived, watched the truck driver remove the black plastic covering the wooden pallet holding three large packages and the ReefCan, then carry all into my office. Next, I opened two of the boxes containing system equipment and removed its various items to see just what system components they were holding.
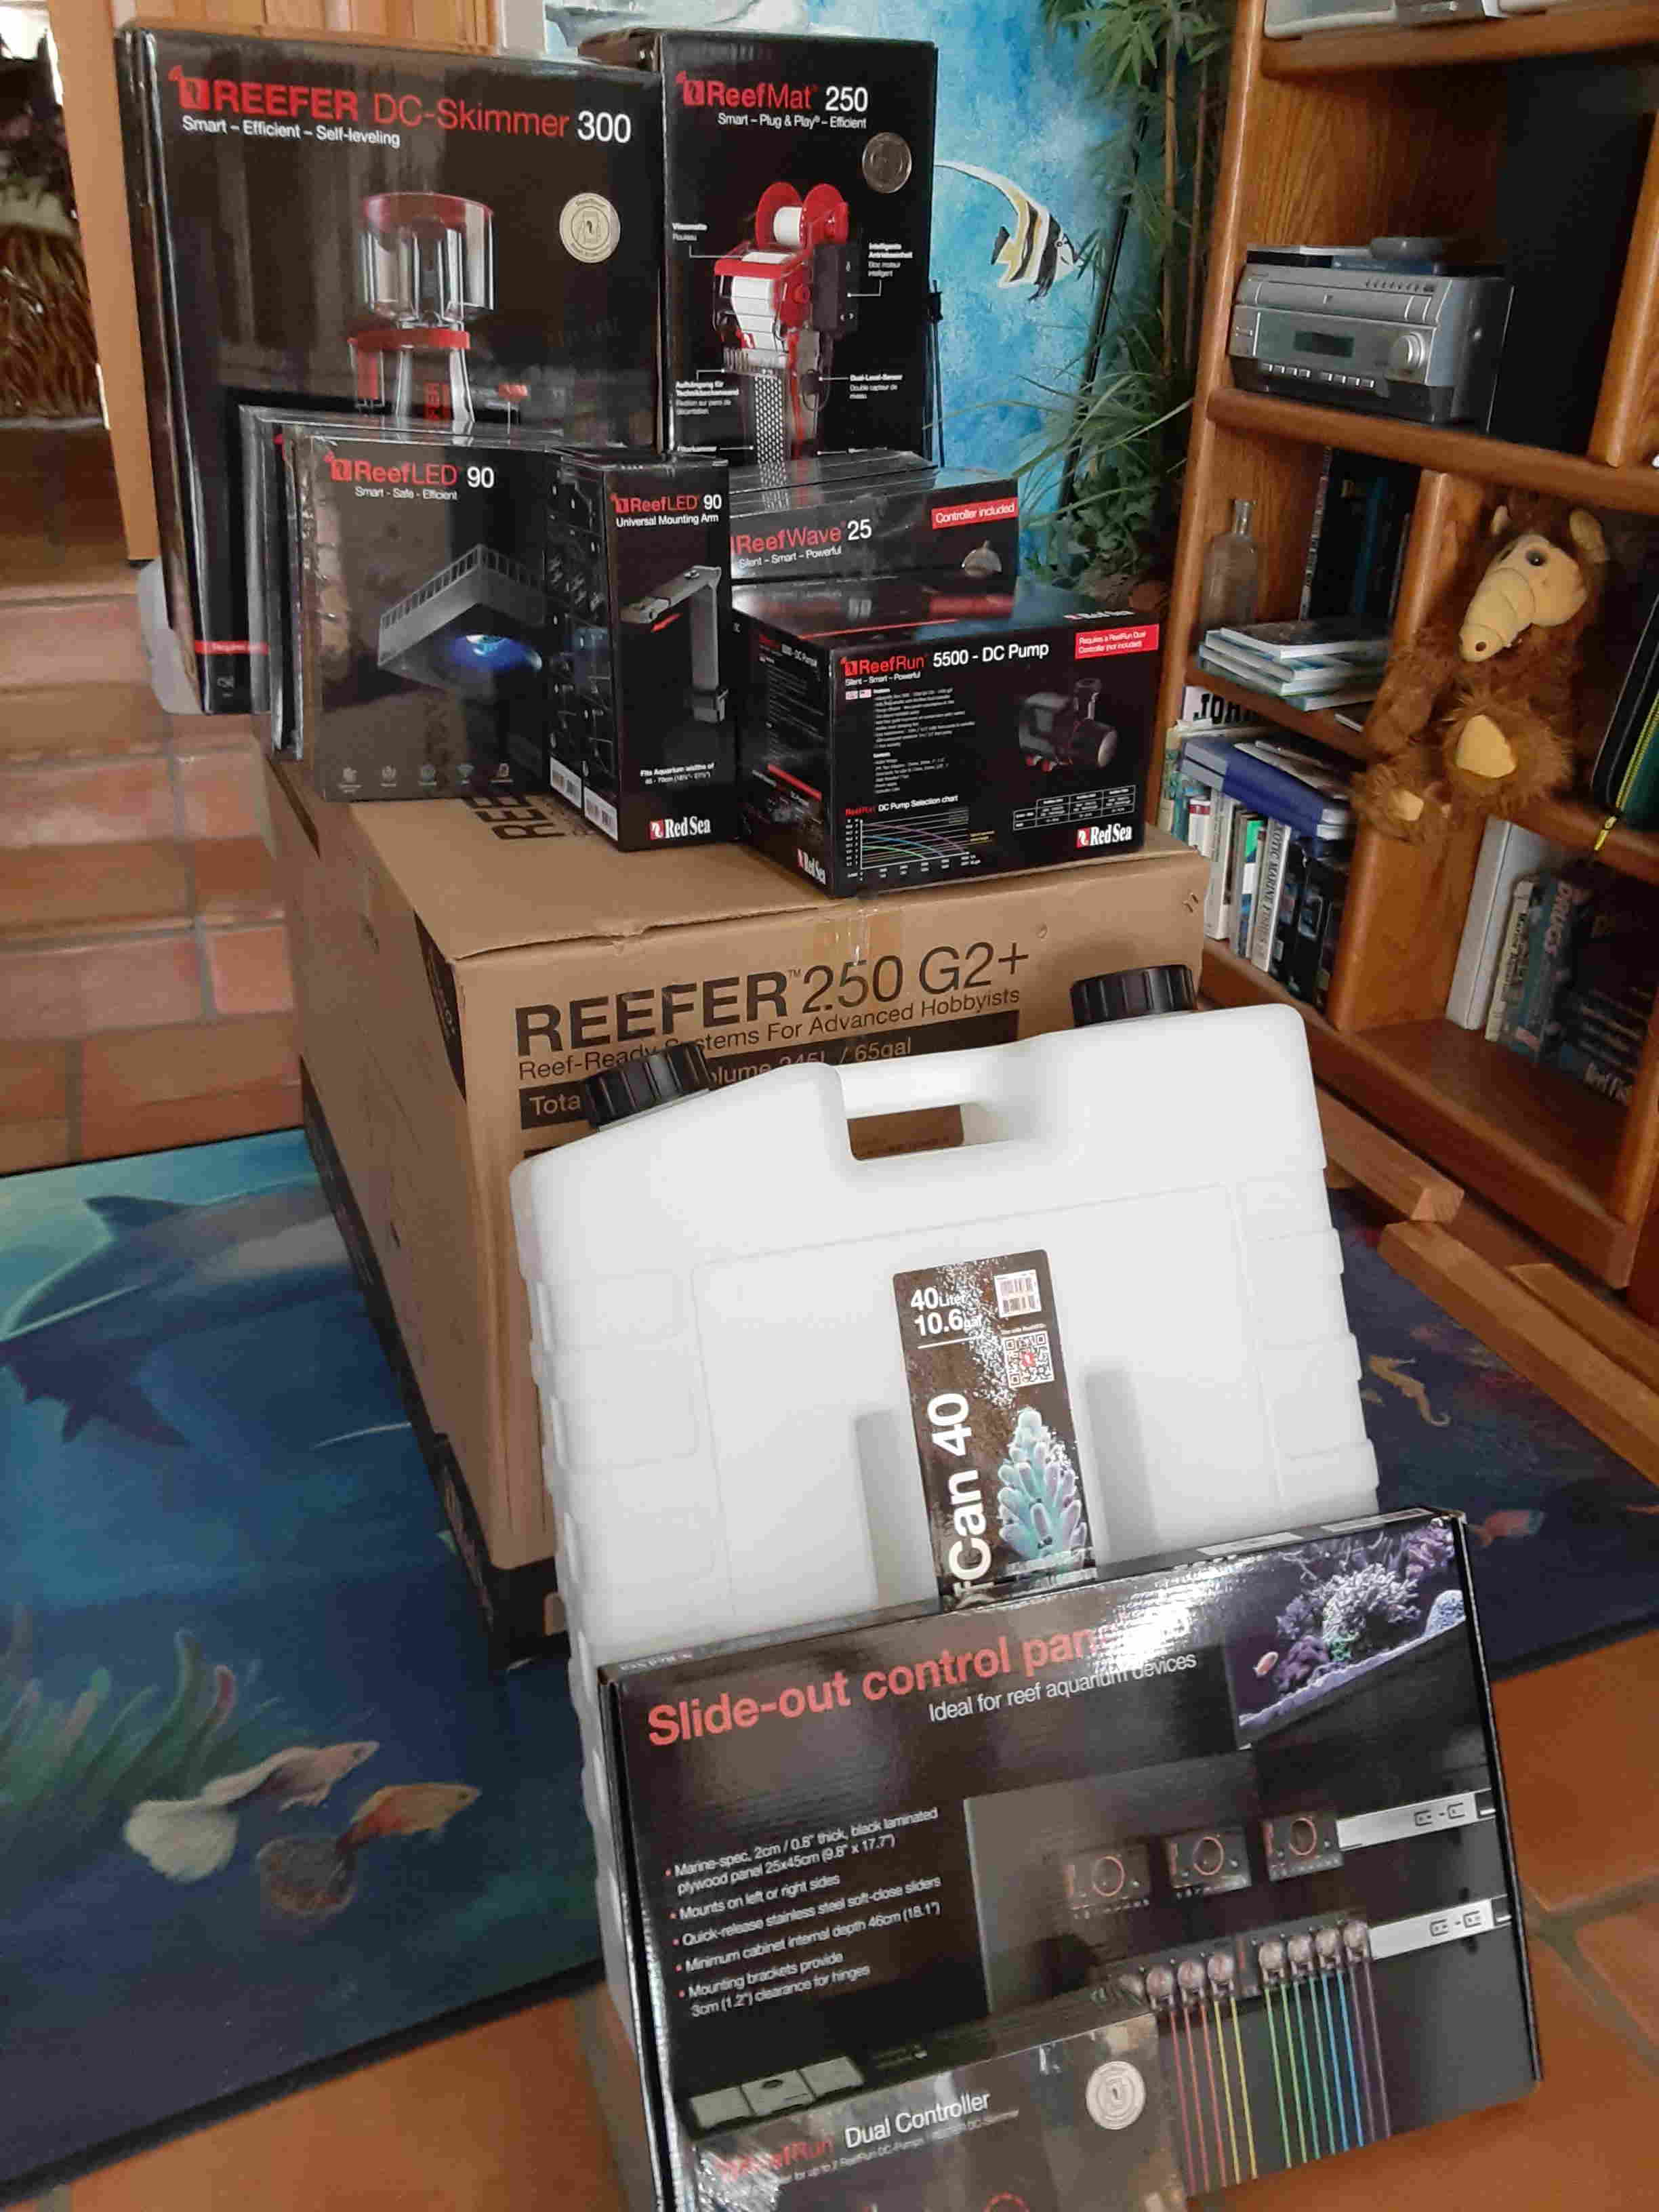
Since it was now late in the day, the following day I removed the surrounding cardboard from the sides and top of the aquarium box to be sure there was no damage. Yet, the way its protected is so well thought out that any damage would be an extremely rare happening! With the aquarium glass now checked out, I removed the sump and the various piping items that are placed inside the aquarium, which are also very well protected with various shaped foam pieces, and placed them elsewhere in my office.
Now, with all system items received, it was time to open the box containing the cabinet sections. Note, the cabinet top shelf section is not located in this box with all the other cabinet sections and is actually located under the aquarium in its shipping container. This necessitates the now empty aquarium be lifted and placed elsewhere. It was then placed on two, 2x4s to support it so as not to damage its lower protruding piping connections under its overflow section.
With that accomplished, and for first time Red Sea cabinet builders, when removing cabinet sections from its box, there are wooden boards on each side and bottom of its box that have no hardware holes. That's because these are solely for protection of the cabinet sections within its box, and these can be discarded. Just another well thought-out way of protecting the contents of everything coming your way!
Now, having all cabinet pieces removed, I reviewed its assembly instructions which first time assemblers might find somewhat daunting. If so, recommend carefully looking at the supplied cabinet sections, as their holes must match 'exactly' their connecting sections as shown in the drawings. It's worth taking your time to be exactly sure which section connects to another section, as having to disassemble a wrongly connected section may somewhat weaken that final connection. Then suggest labeling each section with its lettering code as I do by writing it on a piece of masking tape and placing it on that item. Just saves a little time looking for the next part to assemble in my opinion. And to possibly save some further time, after completing drawing 7, I installed all hardware labelled N and M (alignment pegs and screw-in hardware) into their corresponding sections.
And possibly, again for the benefit of some first timers, the 'Aquarium & Cabinet Assembly Manual' has some drawings that 'might' look a little odd as to what its actually showing. In steps 17 - 20, these drawings show what appears as something hanging over the edge of a 'front' panel. Actually, just that portion of the drawing is really depicting the opening in the rear panel!
To get this far and because my available time for actually assembling this project was very limited, several weeks had now passed. Overall, for just cabinet assembly, would say it took about 8 to 10 hours to assemble. But for first timers, no doubt might take somewhat longer. Simply don't rush it - be absolutely sure the right parts are connected the first time!
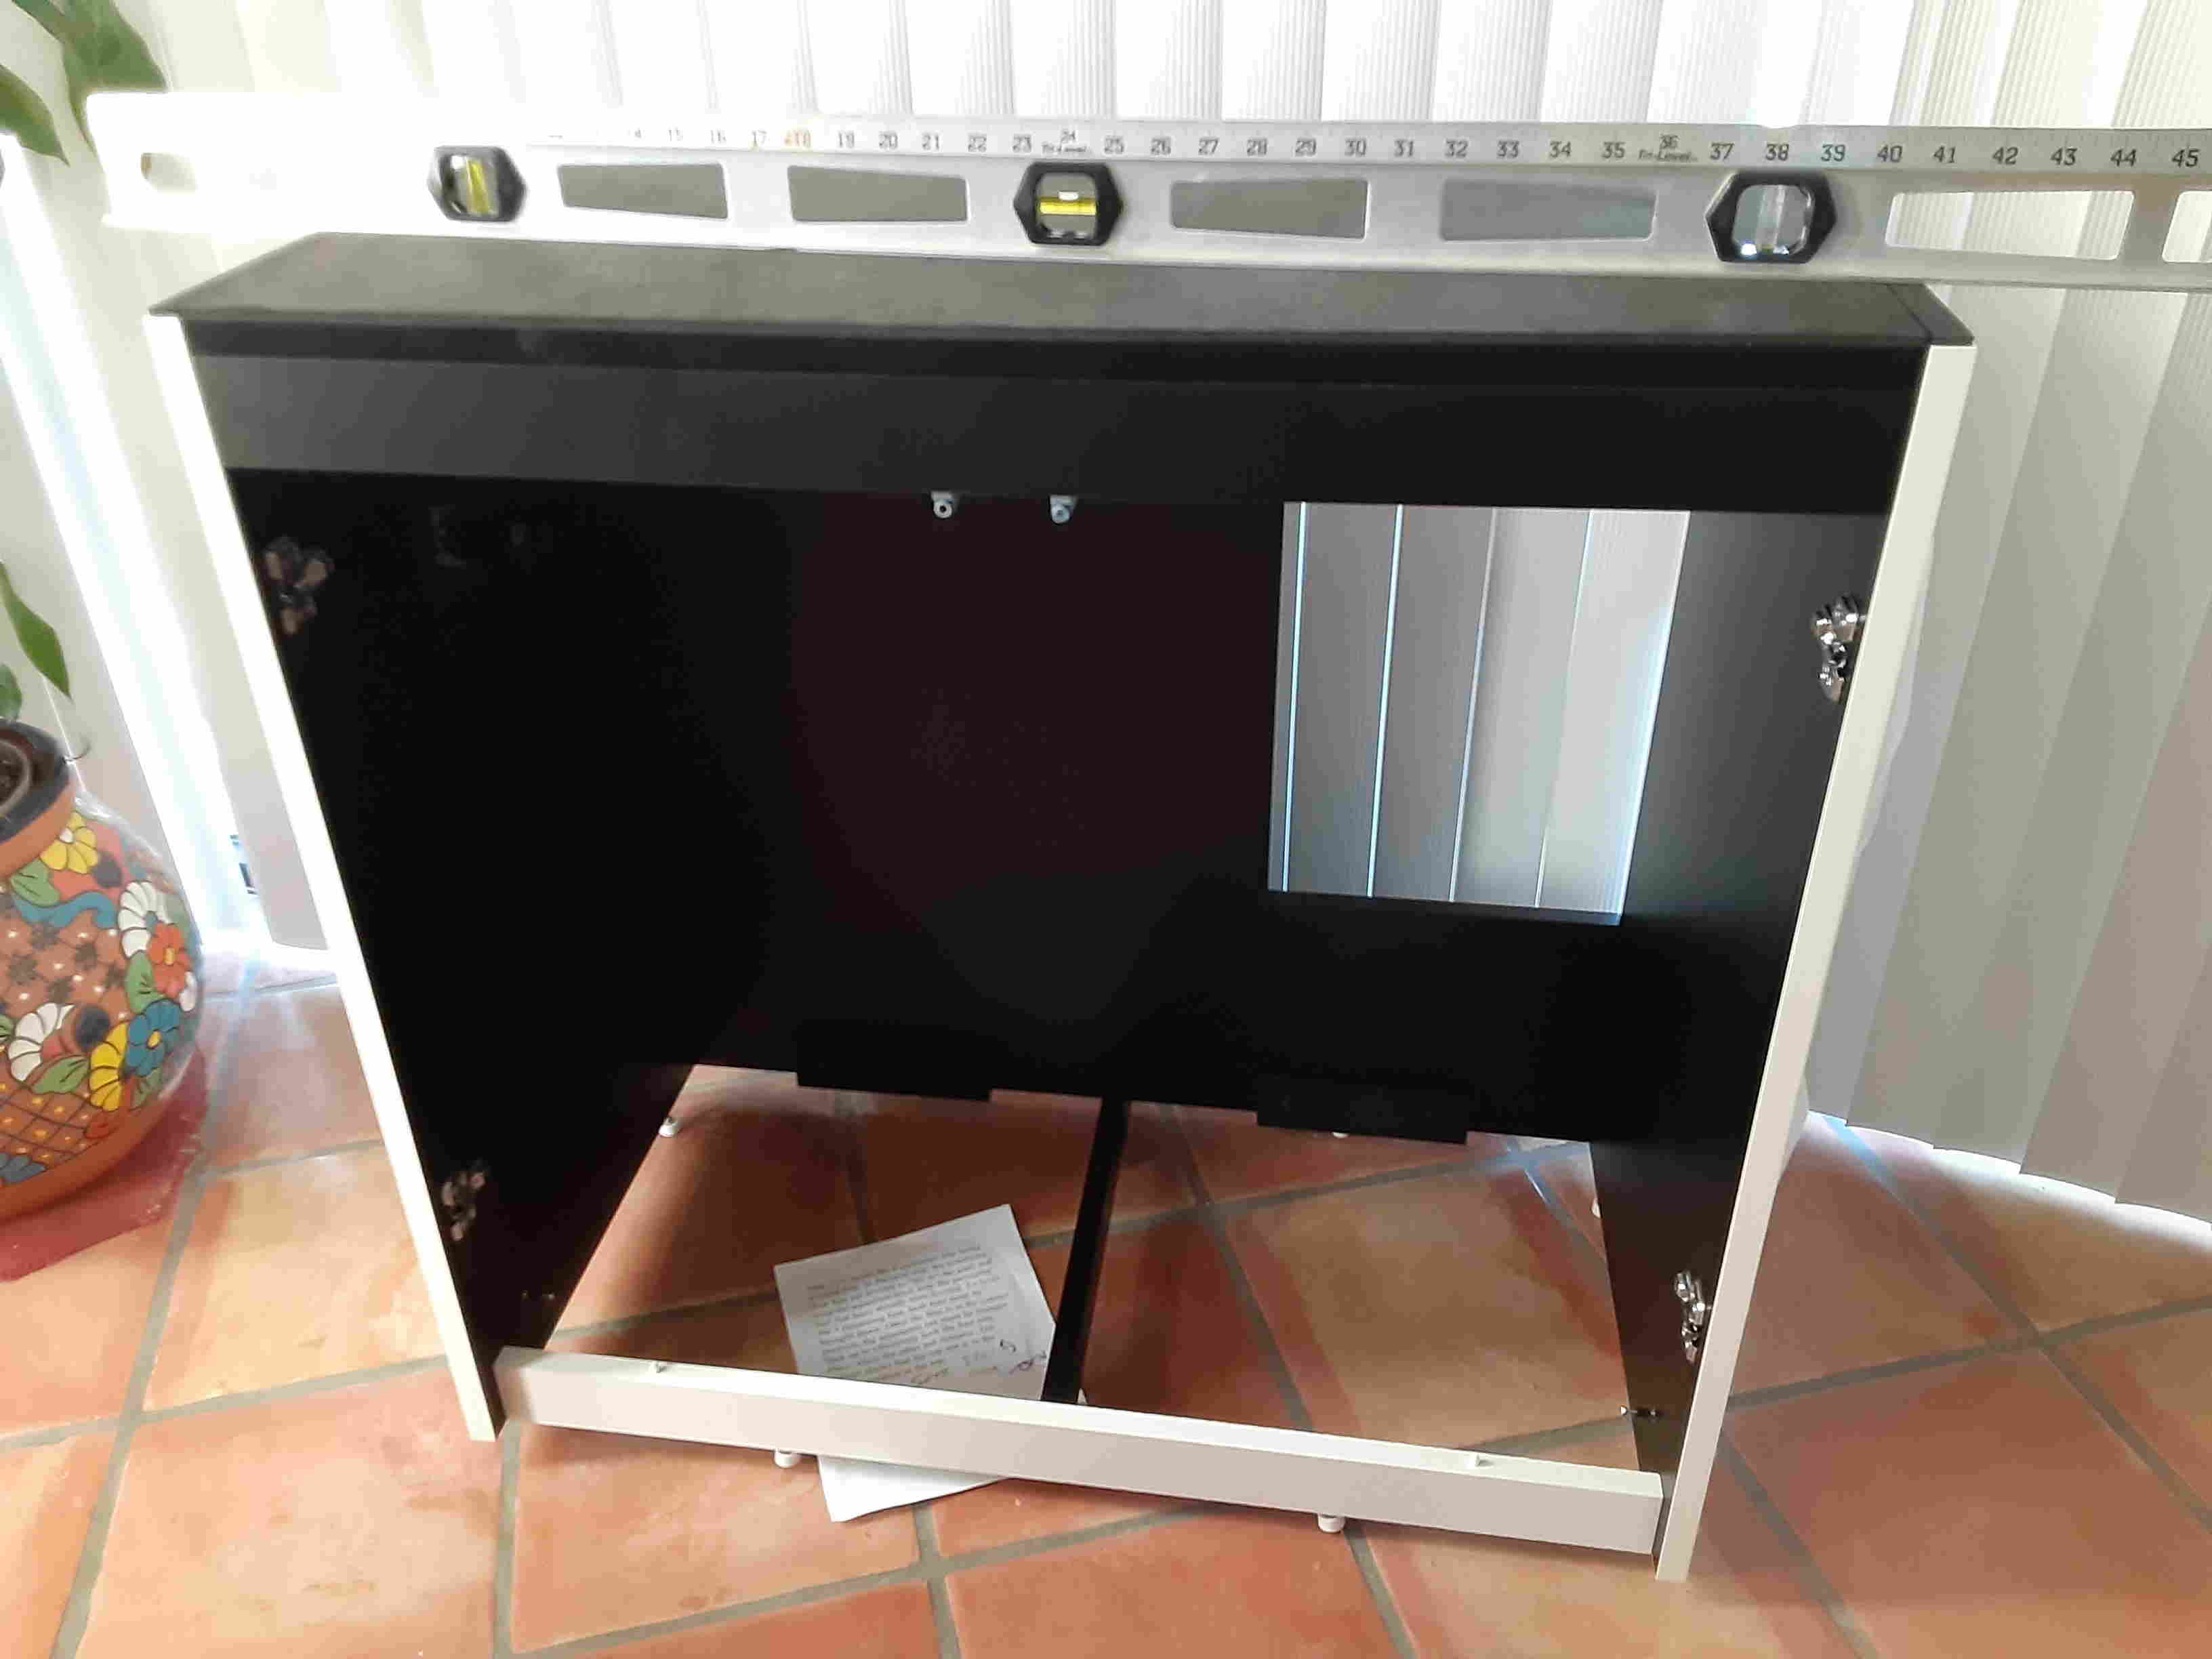
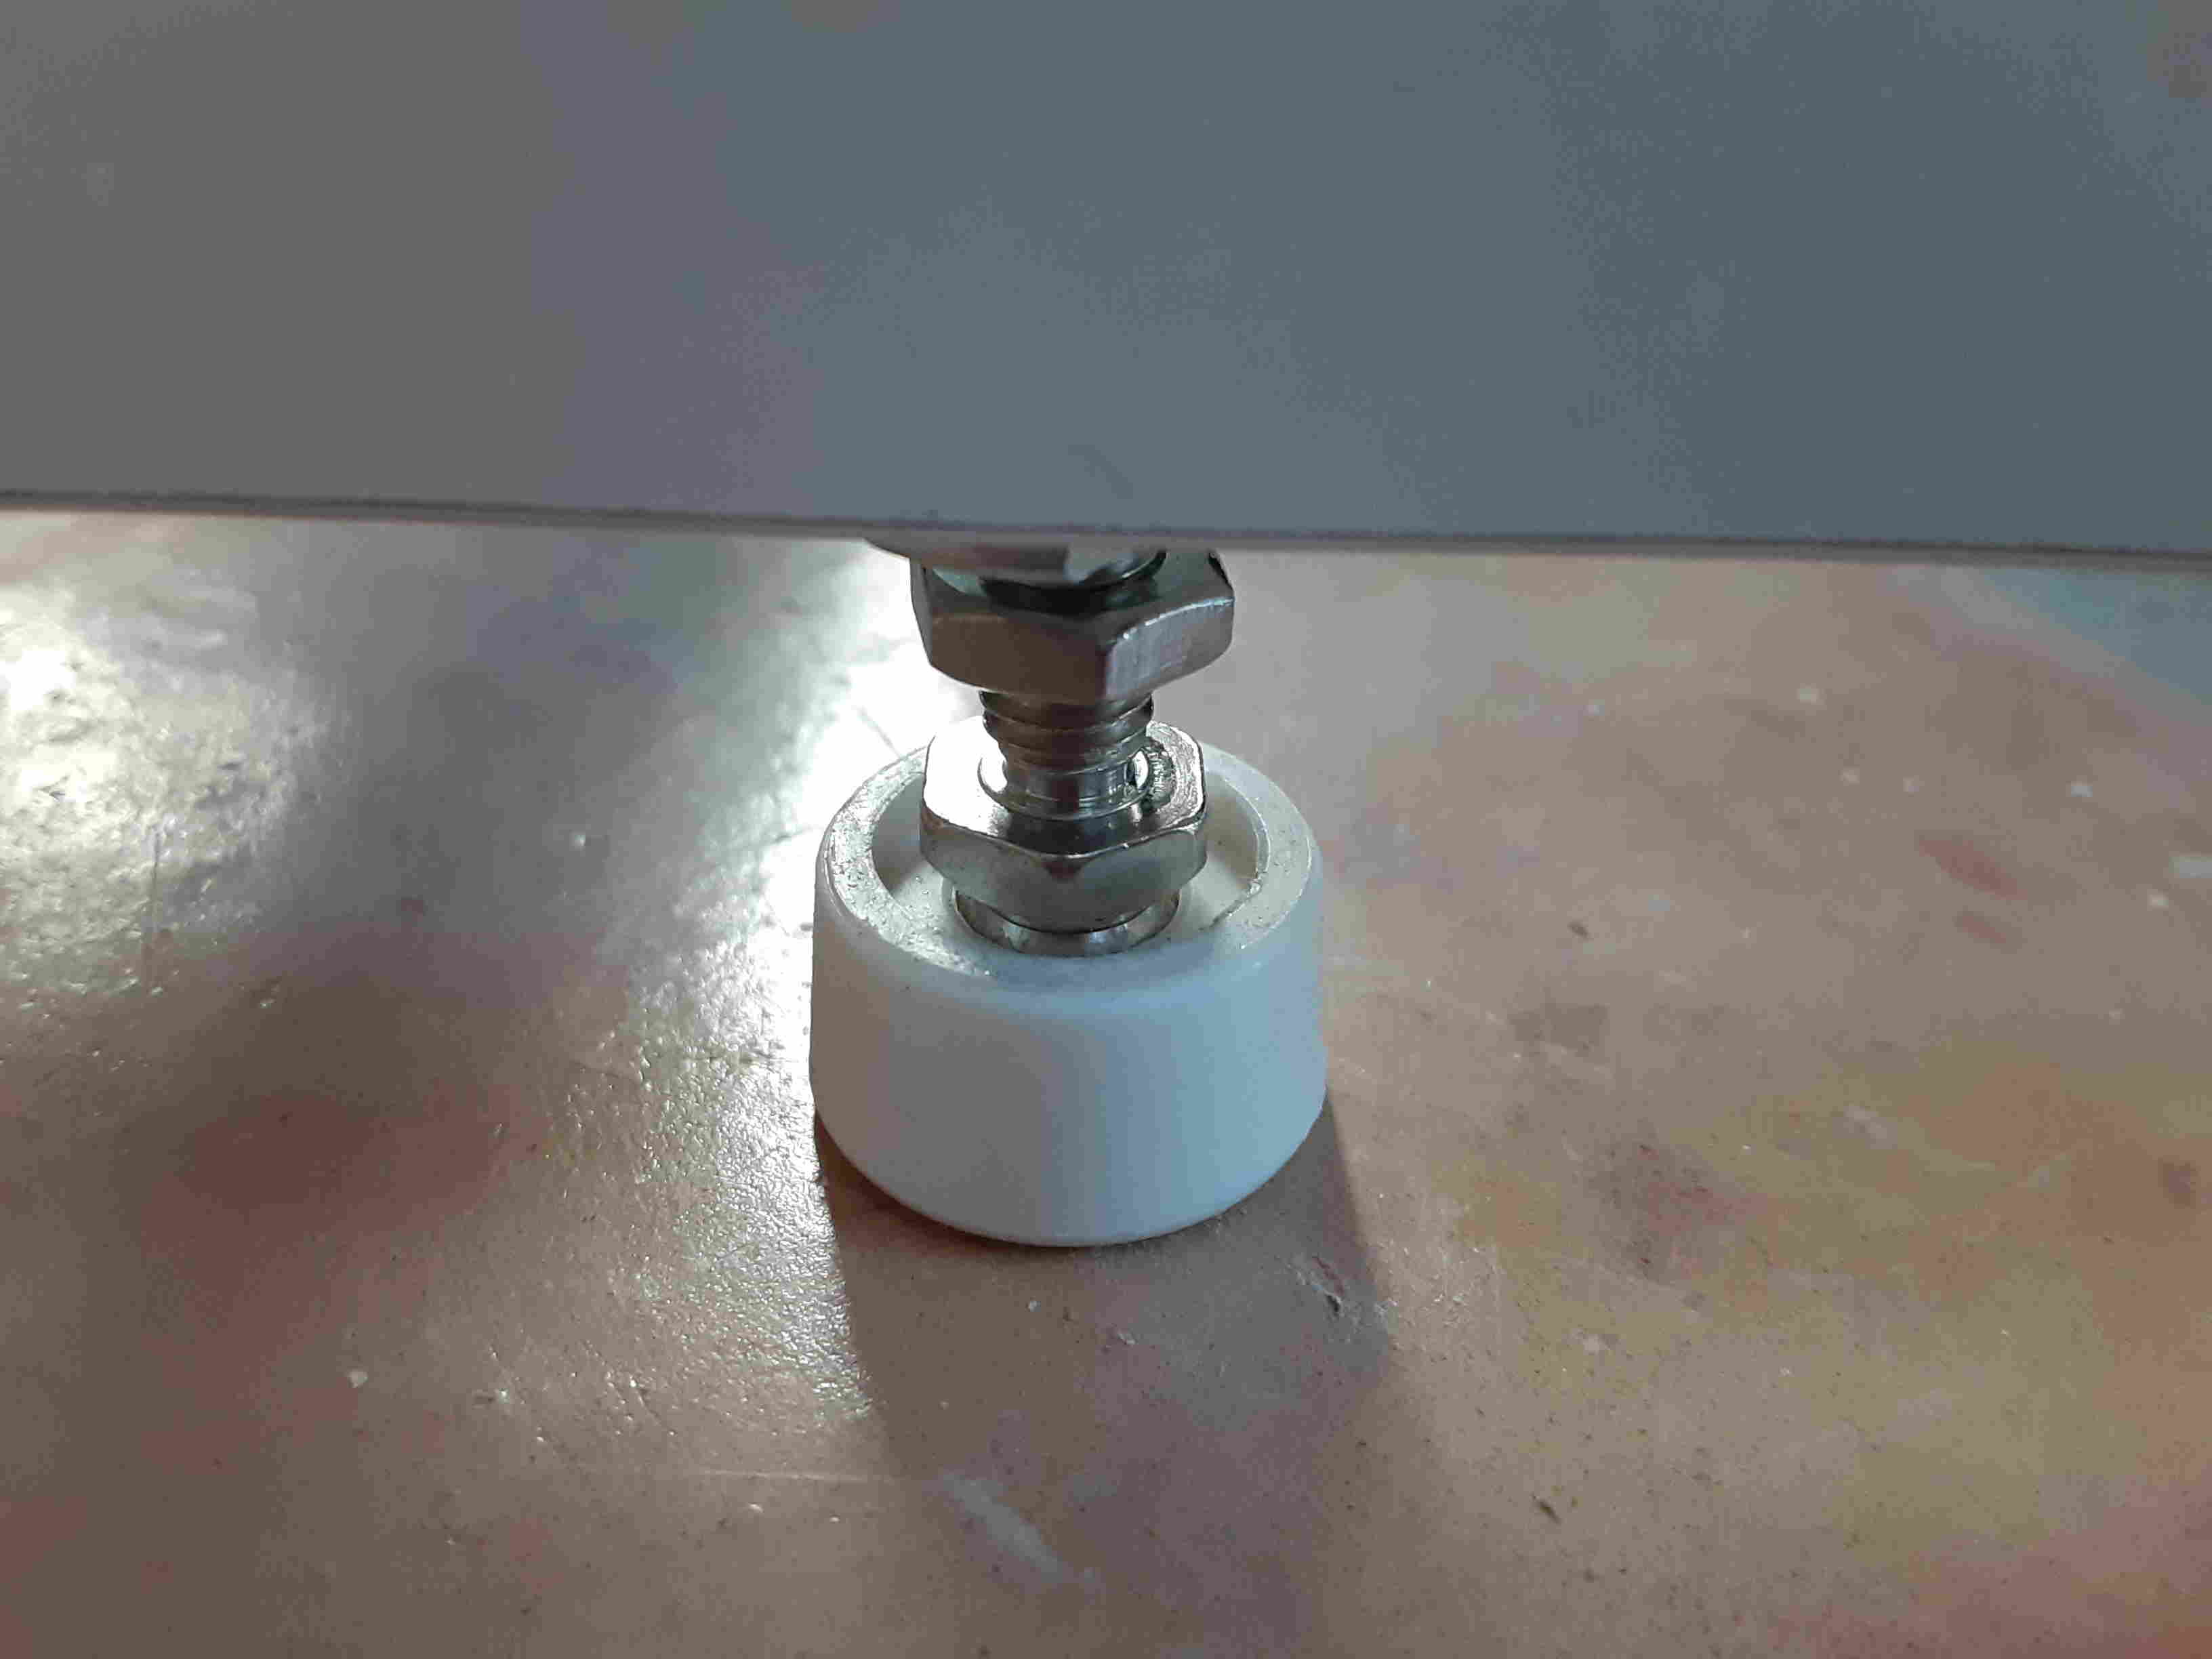
With the cabinet now erected, except for its doors, it was now time to level it before going further. As this unit has 10 levelers located along its bottom edges, placed a level on its upper surface and found both directions, length and width needing some adjusting. I found it simpler to slightly raise the front two, back two and center two levelers somewhat off the floor, and concentrate on those on either side panel first. After those four had this unit level in both directions, then adjusted the remaining levelers so all made firm contact with the floor. Now, with cabinet level, the aquarium was carefully placed on the cabinet, aligning it so its rear bottom overflow area rested over the opening on the cabinet top shelf rear opening. Should mention the cabinet top section already had a cushioned mat applied to its surface. Nice touch!
Once the aquarium was on top of the cabinet, recheck it levelness and found it perfect. Then snugged up the adjustable nut on each leveler to the bottom of the various stand sections.
With that completed, inserted the cabinet bottom shelf and secured it.
Before going any further, decided to install the 'Slide Out Control Panel' before going further, (not installing sump yet), as I wanted enough working space to comfortably measure and drill its required screw holes. And for those that will have this item, I found the back side/edge of the template (cut from the back of its box) should align with the back edge of the cabinet when its 8 holes for its 4 brackets are drilled. If any surface space remains between back edge of cabinet and template back edge, its slider will protrude into the front space for the cabinet right door, preventing it from fully closing!
When this all had completed, system plumbing was the next task, and its three piping assemblies located inside the overflow area were installed along with its upper return outflow assembly. Since only one of the three remaining lower, inside cabinet piping assemblies can be installed before the sump is placed there, the circulation pump piping connection to the overflow compartment was installed. This is because the other two sections of piping have their endings located inside the sump near its bottom.
As a point of information on what I do when connecting such items having an O-ring, I have always placed one or two drops of water (depending upon size of O-ring) on my index finger, then spread it evenly onto the visible surface of the O-ring. That's because I prefer to have a very slightly dampened surface making contact with its connecting dry surface, therefore allowing it to be 'slightly' more secured. Never did like tightening a dry O-ring surface to another dry surface! Has always worked well for me and never experienced a leak on such connected fittings!
With this now complete, assembly instructions said to place doors on before installing the sump. So installed the right door, then the left and began adjusting the fit as needed. Unfortunately, one of the hinges had a defect and would not allow for the door to move forward or backward for adjusting its fit as needed. Contacted Customer service and they 'quickly' sent a replacement hinge.
Once door adjustments were completed, inserted the sump and was 'Shocked!' It rocked back and forth! When this entire unit was received, it was necessary to remove the sump from inside the aquarium so as to get to the cabinets top shelf as previously explained. When this was lifted out, I noticed the sump's bottom applied mat appeared to be only cemented to the outside area of the sump bottom panel! Didn't give it much thought at that time, as just thought they missed cementing that portion of its bottom padding. But no, with it now placed on the aquarium's bottom shelf, found that large bottom central area to be an air bubble about 9 inches across!
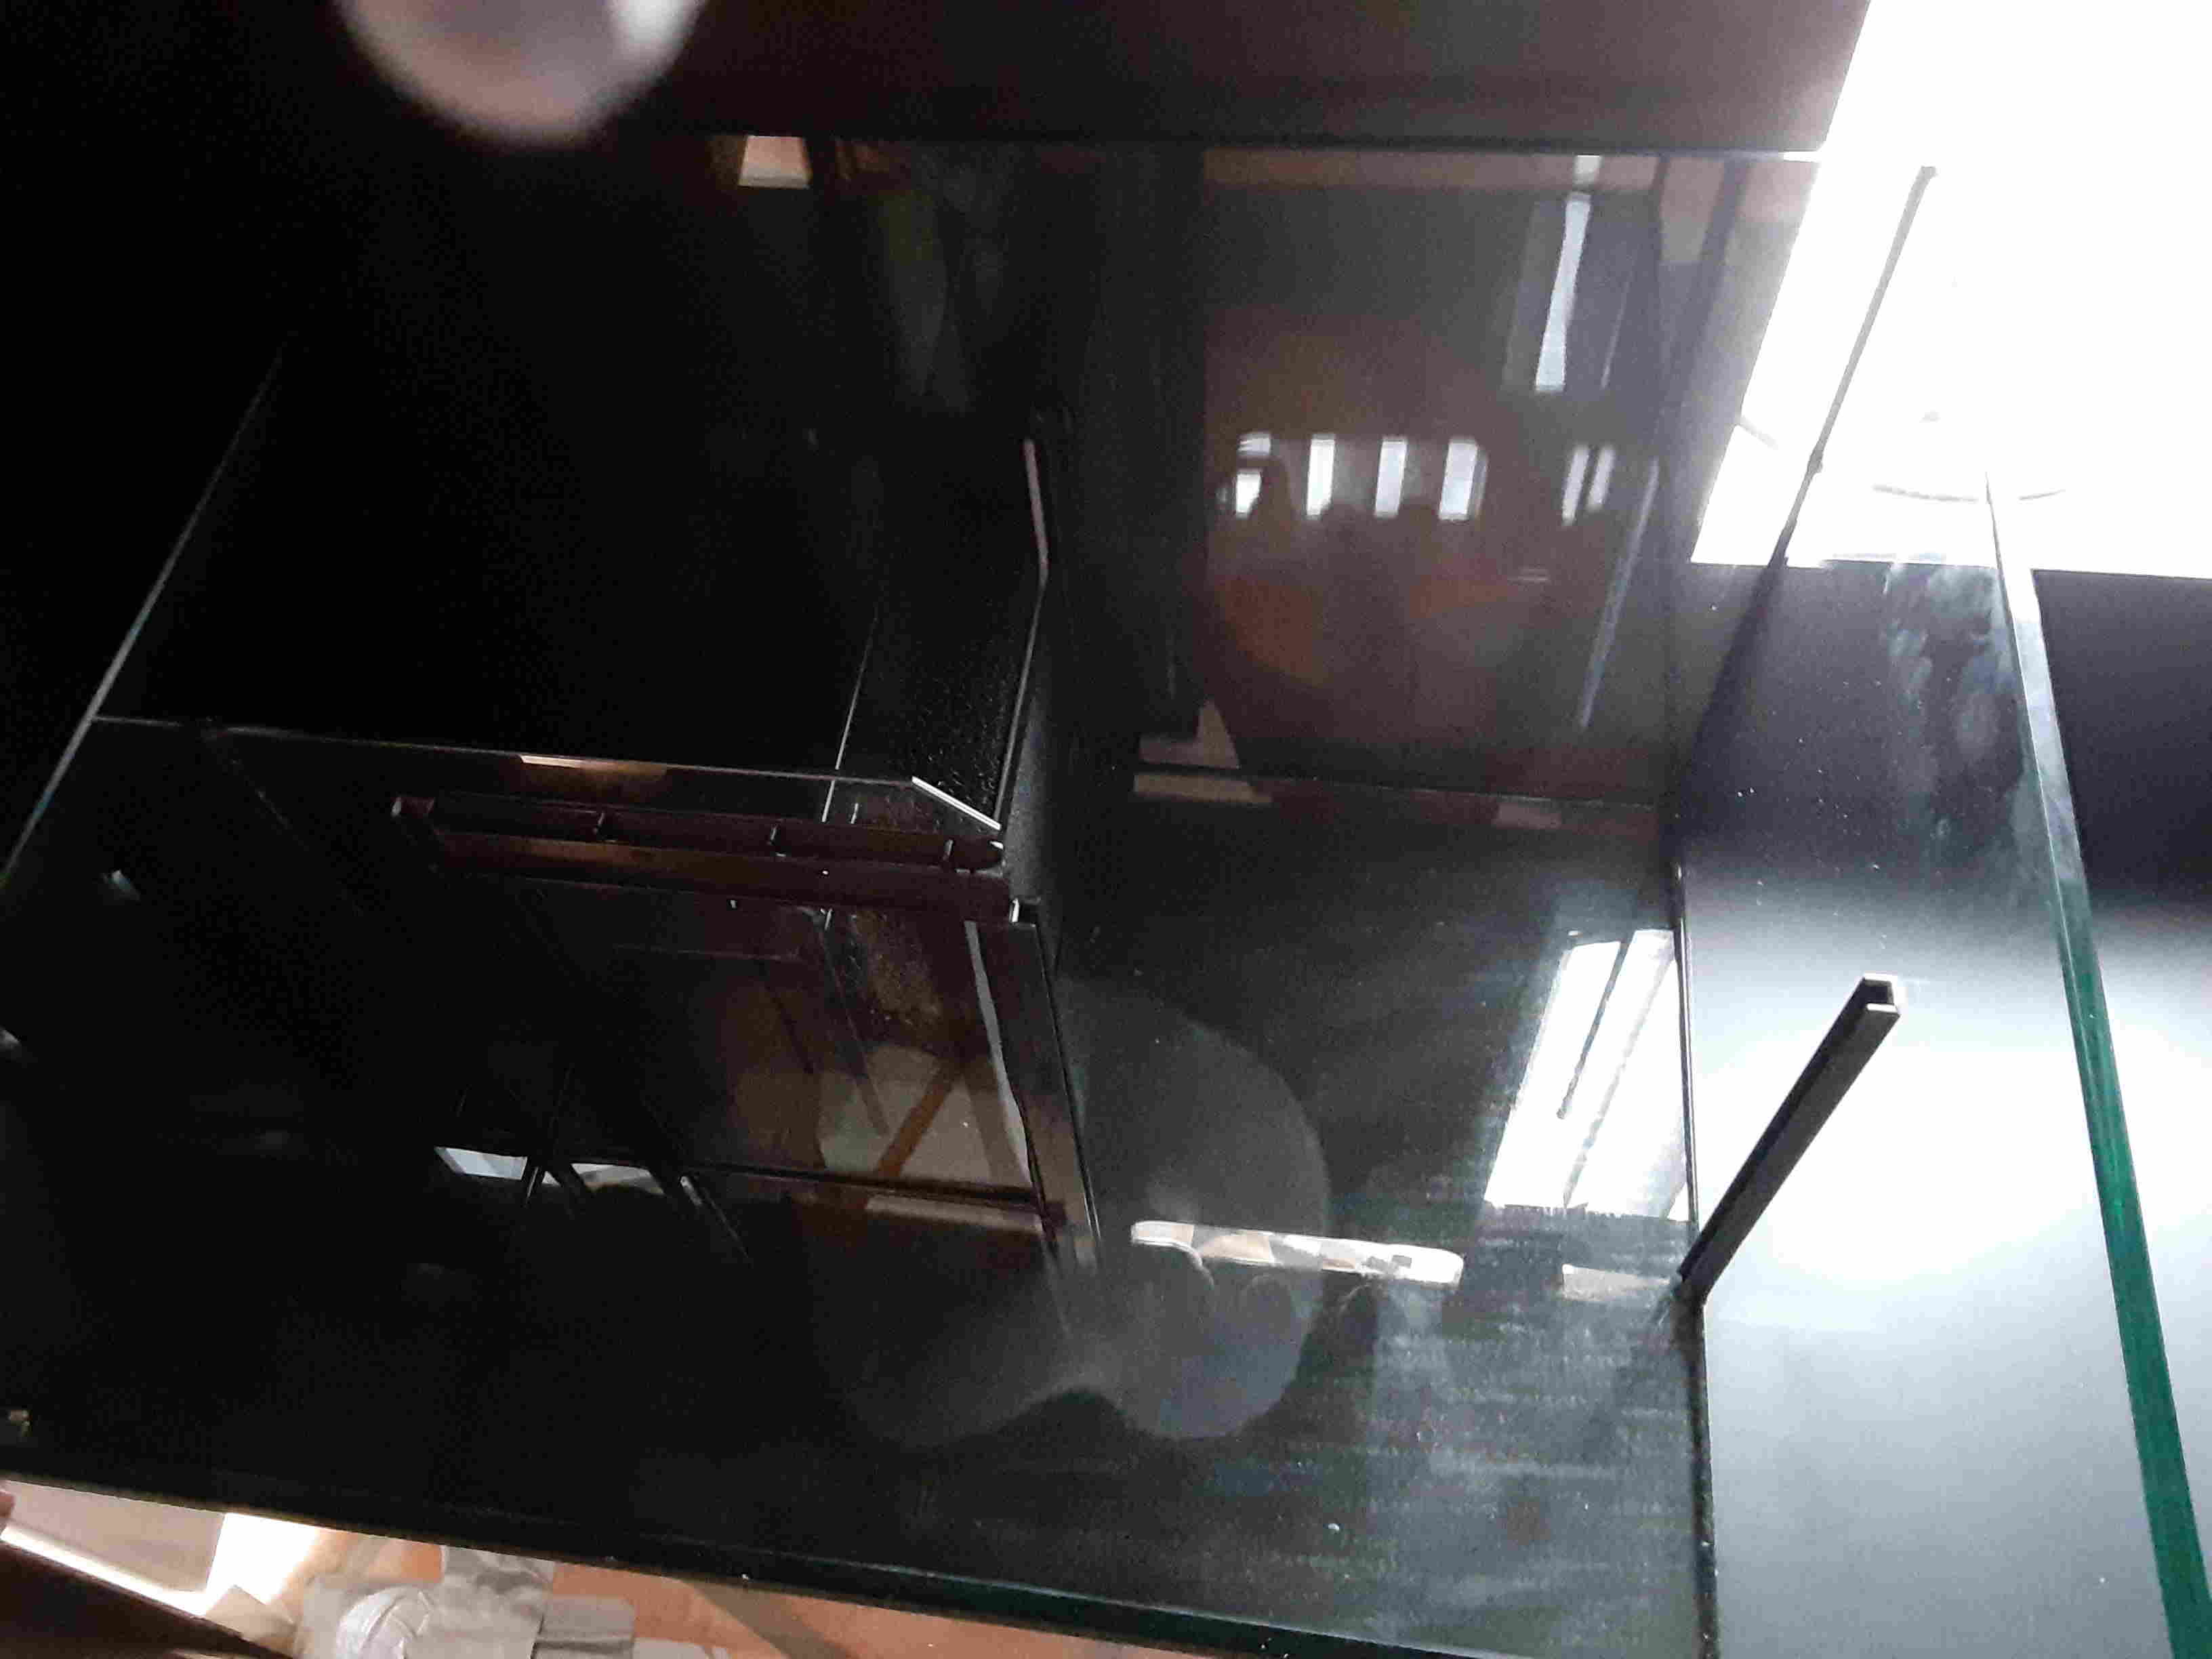
That was enough trapped air to act like a central roller, as the sump actually would rise and fall about 3/8 inch when its top front edge was pressed down, then released! The fix was simple! I placed the unit on its back side and when doing so, also found another, but smaller air bubble. Then using a razor blade, made a couple of cuts though each bubble area. That released all the trapped air, and the sump was then totally flat on the bottom shelf. Just something that slipped by quality control, but not a major problem. Moving on...
Next, with the sump now on bottom shelf, if its placement is to be as close as possible to the cabinet's left wall, it would come up against the lower left door hinge! If remaining in that position, should the bottom hinge ever become defective, it would be impossible to replace it as there would be no space to get your finger to its back release button and pop it off. So...with the sump now about 2 inches from the left wall, installed the remaining two downflow pipes, which end inside near the bottom left side of the sump. Then carefully slid the sump to the left just enough to allow my index finger to touch the rear of the lower hinge and still have safe entry of these two remaining pipes. FYI - the space from inside the cabinet wall to the left side of sump is now 1 3/8 inch - just enough (with my fingers) if ever needing to replace the hinge!
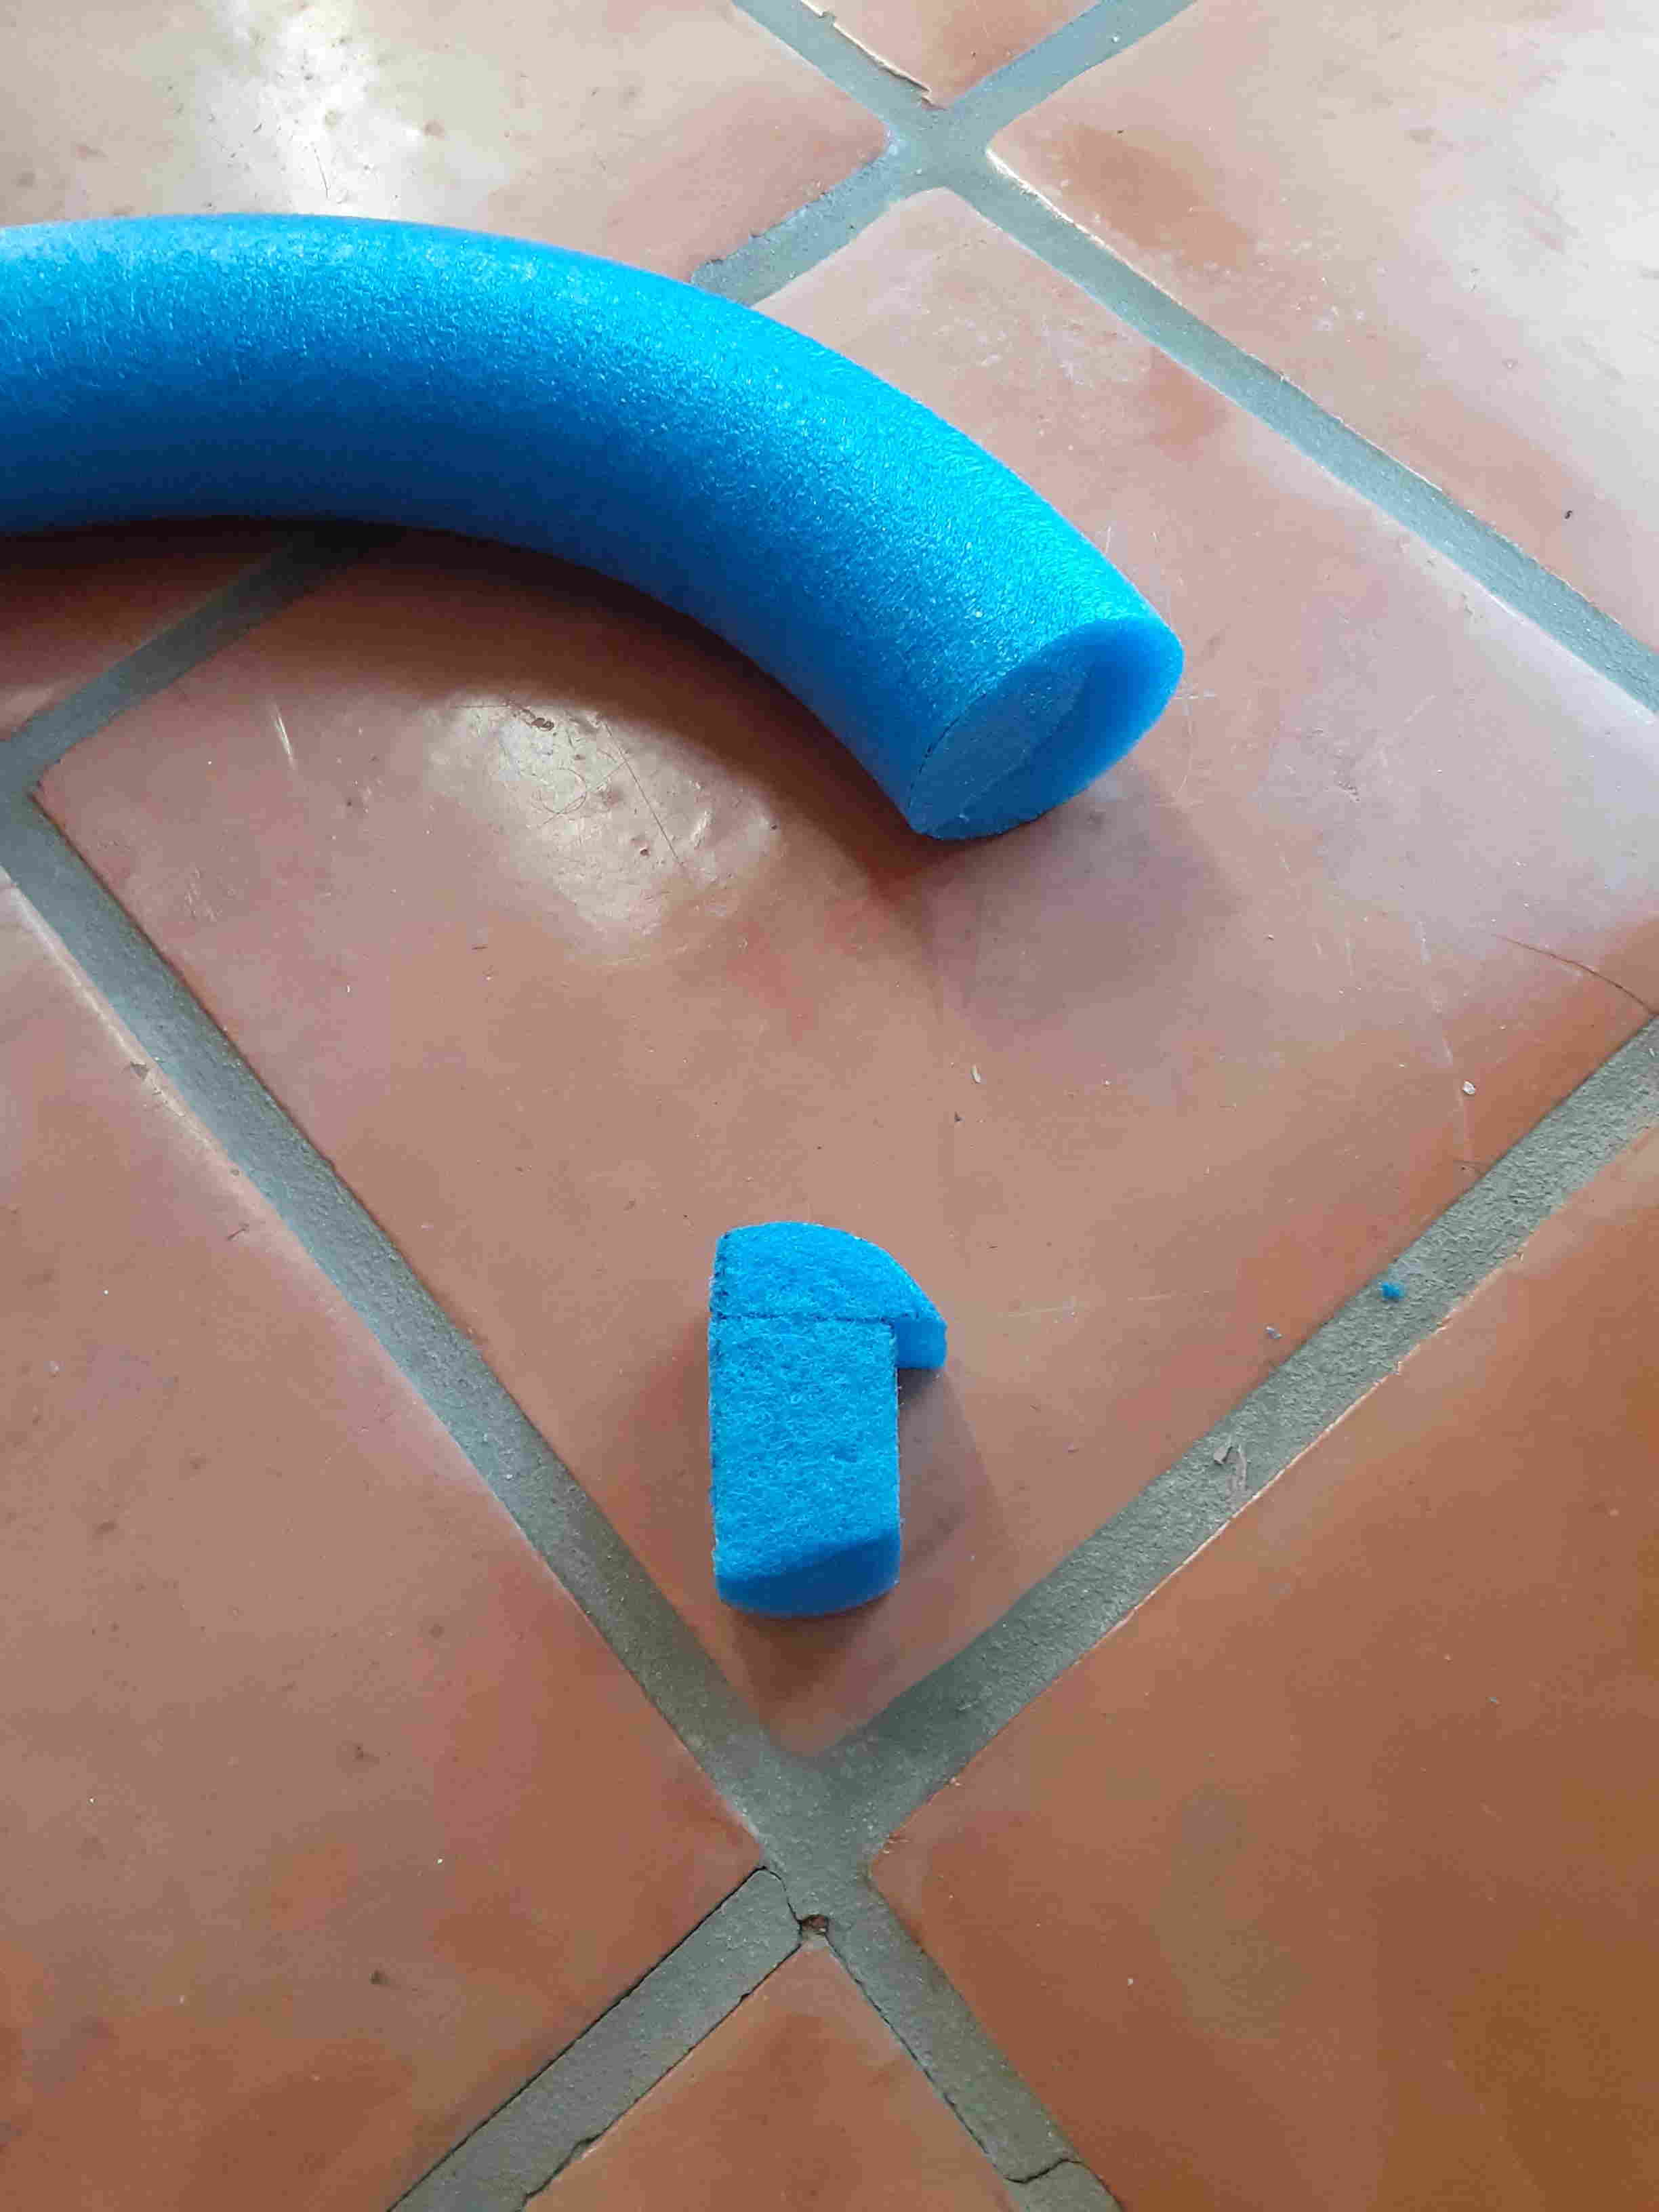
When that completed, did not like that empty space on the sumps left side as it would be difficult to remove anything that might fall into that narrow gap. So, I purchased a length of swimming pool foam noodle tubing. Then trimmed sections of that tubing to fit that gap (shaped as in photo), giving the sump installation what I think a more 'finished' appearance.
Now with the sump placed, 'tried' to insert the ReefCan 10-gallon/40L unit next (which was stored in the corner of my office behind many of the aquarium equipment boxes) so I could judge its tubing connection lengths soon to come about. To my surprise, it was too high to fit into the cabinet! I should note here that before ordering this size ReefCan, I went online to check its price and size. What I saw at three different companies selling the product, was:
"Red Sea recommends the ReefCan 18L to fit inside their Reefer G2+ 170 and 200 models and the ReefCan 40L to fit inside the cabinet of any of their larger models."
Therefore, when the time came to purchase this system, I selected the larger ReefCan. After a little head scratching, I decided to place this larger unit behind the cabinet, as the evaporation rate for this size aquarium would have me filling the smaller unit too often. Lesson learned - go directly to Red Sea for their product descriptions!
With this now completed, installed the circulation pump with its adjustable water intake shield facing in the correct position to prevent sucking air should its chamber water level fall a little too low - nice touch! Then connected the supplied flex tubing to the pump and other end to the above return piping and secured its end connections with SS hose clamps.
Then time came to place the ReefMat and Protein skimmer in the sump. This first resulted in the skimmer being partially disassembled to insert its pump so as to face the preferred direction in this Reefer 250 setup. As with all new pumps, I like to completely open them to see its inside workings/accessibility for maintenance when needed. Will say to open the skimmer pump, there is one little screw to be removed, then the face plate it holds 'must' be rotated counter-clockwise to remove. Only found that direction on the WEB, but thought I would mention it here for those reading this review since it was quite difficult to initially move. As to the ReefMat, its manual made the installation of its fleece roll quite simple.
Once all the equipment was in place, it was time to address its wiring. Will say all equipment had about ten-foot-long electrical cords making connections to various electrical sources/outlets, quite easy. Nevertheless, having nine electrical plugs (including a heater), DC return pump and DC skimmer additional wiring for its Dual Controller, and overall, 6 ballasts which should be outside the cabinet due to their warmness while operating, did present an emplacement challenge!
Now, with the cabinet, aquarium and all its equipment and wiring in place, I decided aquascaping would be my next chore before adding water (and writing Part 2), as this would closely show how many gallons the entire system would hold when filling came about.
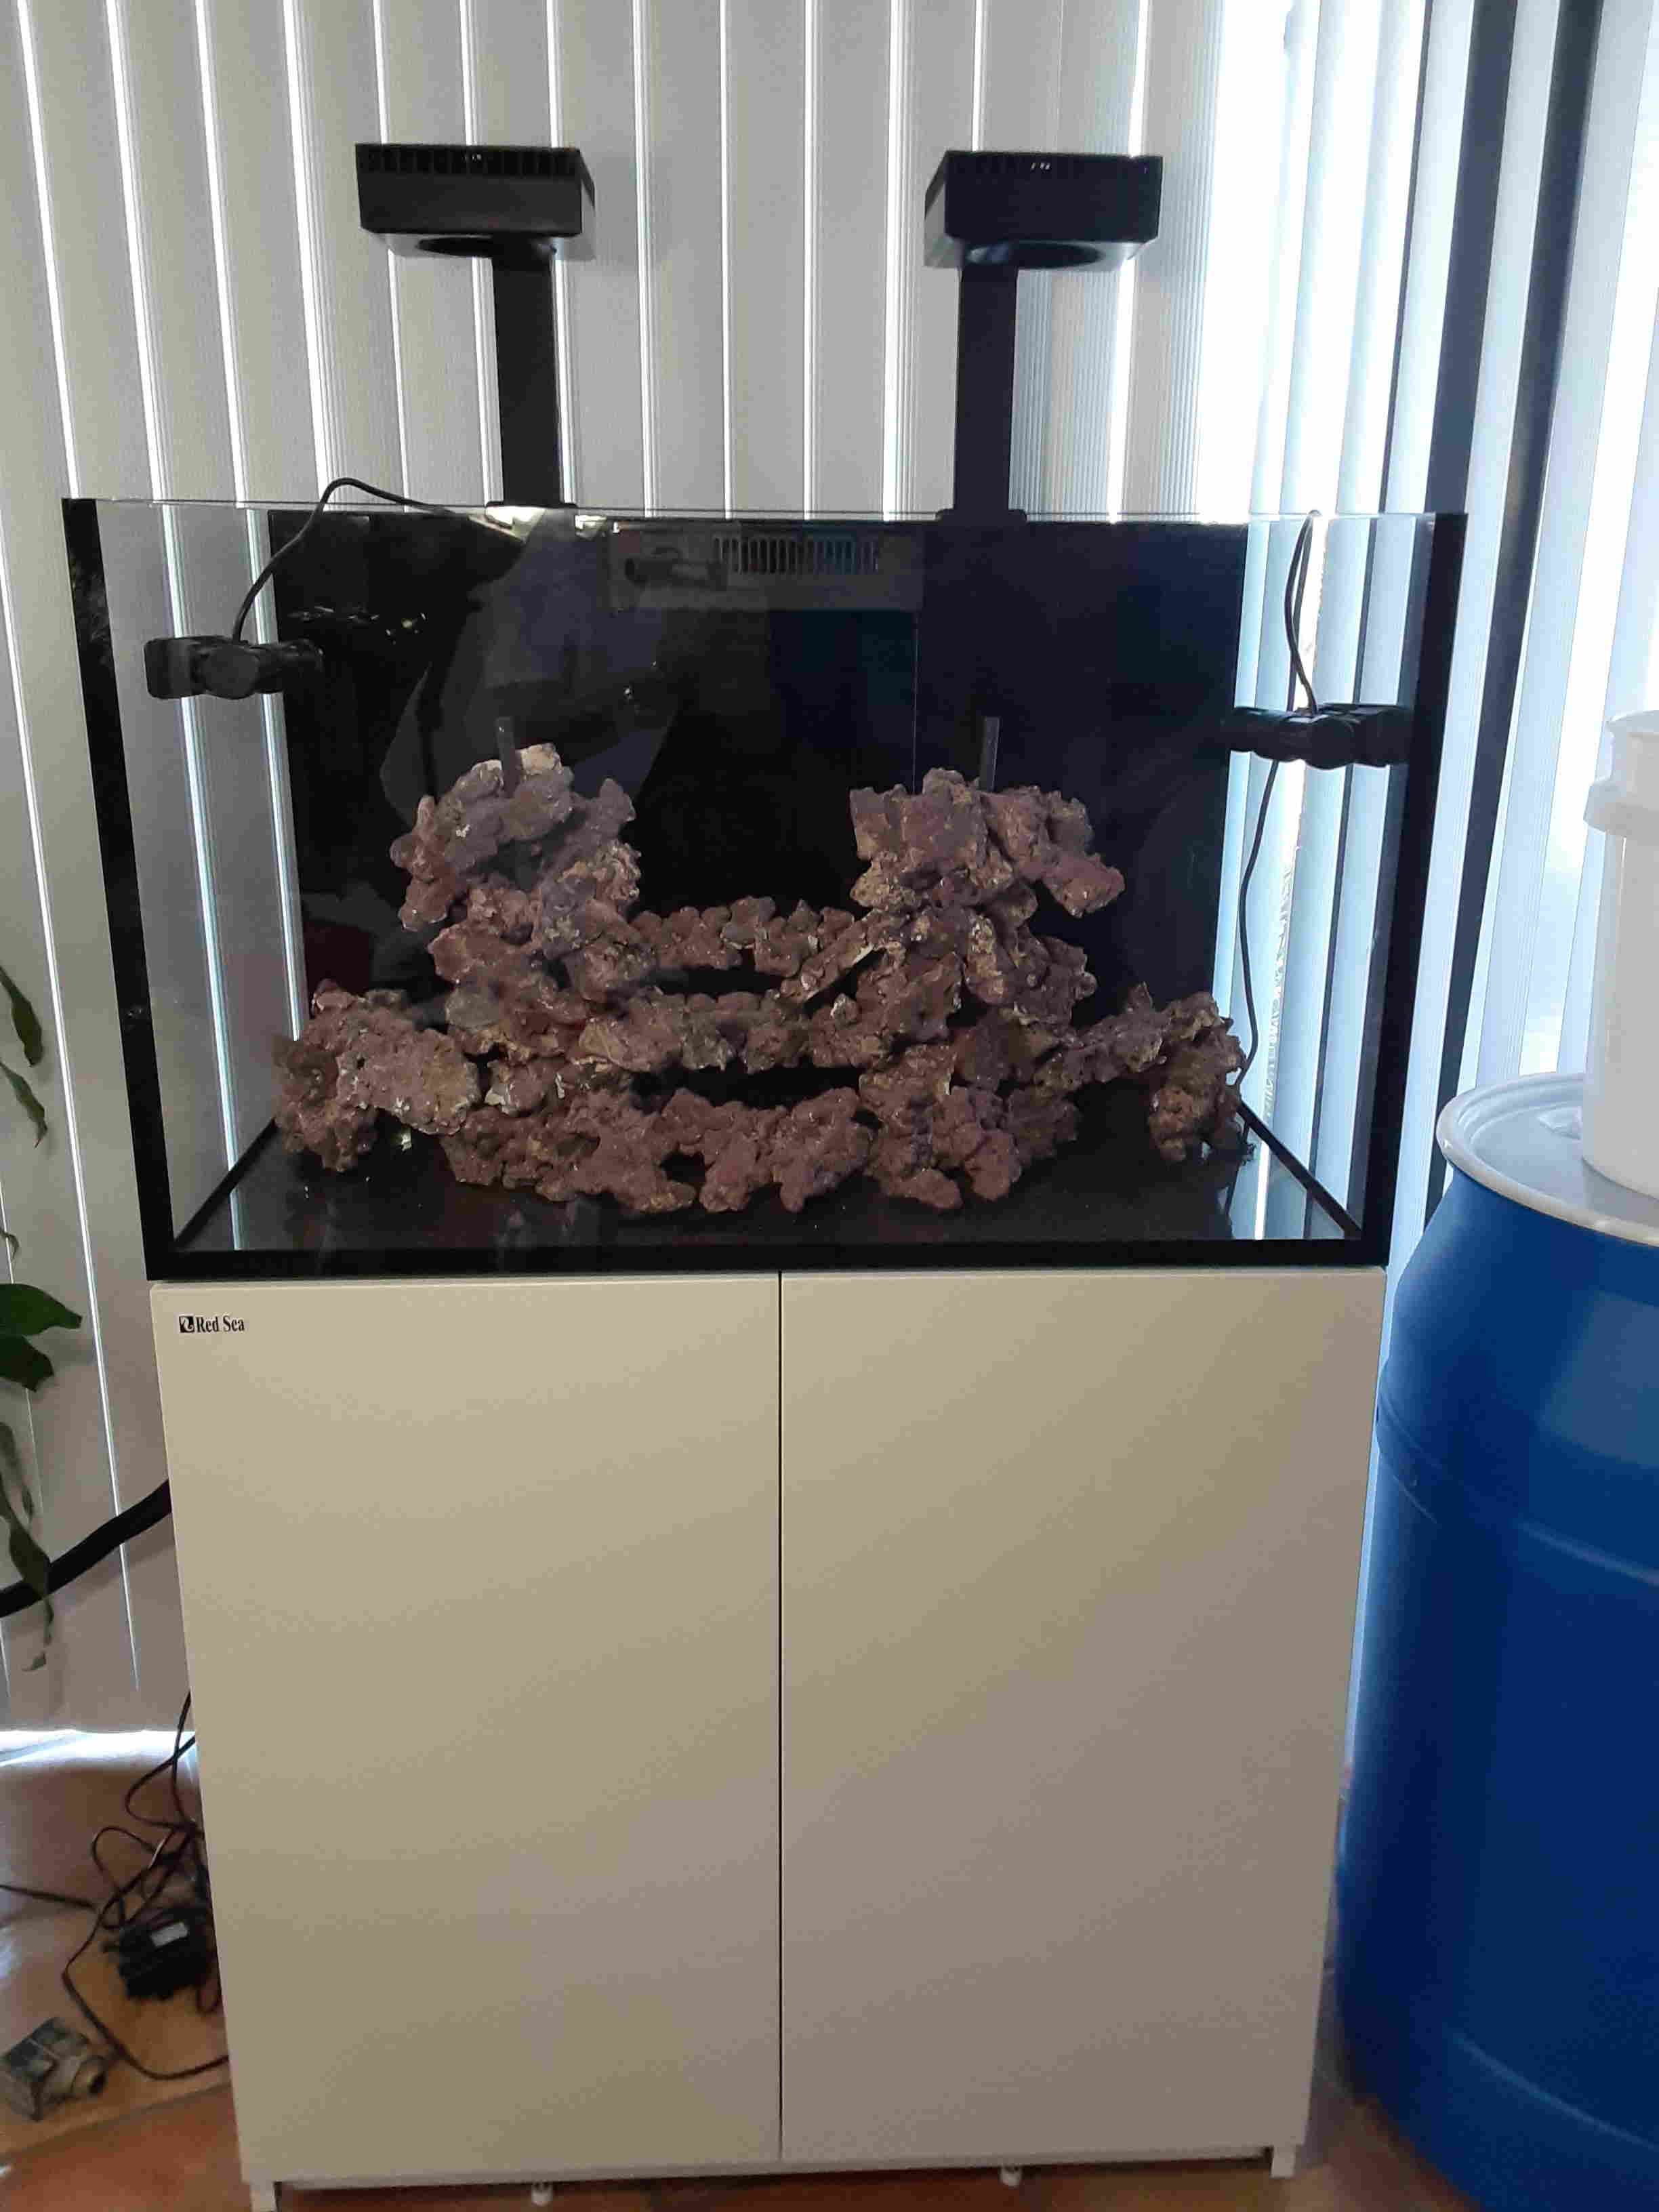
Since this would be a bare-bottom/no sandbed, very low nutrient environment with various species of Montipora requiring somewhat swift water flows, my choice of 'rock' would remain as to what was used in my previous marine aquarium, which was CaribSea LifeRock. This would provide a 'wide' array of shaped 'Coraline-coated looking' rock sizes and an overall configuration allowing for excellent water flow through various portions of its overall structure.
Finally, have reached the end of Part 1, with the forthcoming Part 2 - the filling and system tuning of its various equipment: ATO, DC operated return and skimmer pumps, ReefMat, ReefWave pumps, ReefCan, LED lights and thoughts on ReefBeat, will come about as time allows.
FILLING & OPERATION
After finishing the initial equipment setup (Part 1), my next task was getting the amount of water required and its correct salinity ready for the 'big' day!
That all started on a Friday morning when I connected my RO/DI and its pressure pump and by that evening had my 55-gallon water storage barrel, as seen in Part 1 next to the aquarium, and three 5-gallon pails filled with zero TDS water. Then, since I changed my mind about having a sandless system, enough sand was cleaned and added to the aquarium, as I decided to go with a shallow sandbed.
Early the following morning, using Red Sea Coral Pro Salt, then got each to a salinity of 1.025. A few hours later, all was ready, and first, using a small hand flask, poured some water into the rear overflow compartment to leak check its various fittings. Finding none, and having had two past Red Sea systems that utilized a 'black' downflow valve, I repeated the filling process as I had in past systems, even though this downflow valve was red, not black.
Hoping to get everything filled and water circulating prior to one of my local aquarium clients coming that afternoon to discuss ReefWave pumps, another client happened to stop by my office. He wanted to chat about adding some new fishes to his 125-gallon system before visiting some local aquarium shops. While chatting, I then began pumping water from the barrel into the aquarium, and also added some more to the rear overflow to the point it was level with its downflow opening. Then, with what was left in the barrel and some from the pails, I filled the sump to 7 inches in height. At that point in time, my happy client went on his way, and I went to lunch.
Then, in that early afternoon, I supplied power to the DC return pump, which in turn supplied power to its position on the ReefRun Dual Controller. It was now ReefBeat time, which I had already got up and running last night, and turned the pump on and set its flow intensity and readjusted the sump water level to keep it at about 7 inches. But there was downflow noise and, as I had done in past systems, tried downflow valve slight movements in both directions, but it did not help. This was rather frustrating, as I seem to remember in past systems small movements of this valve quickly silenced downflow water noise!
While sitting in front of the aquarium somewhat perplexed, decided the ATO needed to be powered up. I should note here, the ReefCan had already been placed behind the aquarium as noted in Part 1. At that time, it was filled with zero TDS water and equipped with its pump and tubing along with placing its sensor in the sump before installing the system's return pump. I did that because working in this small return pump chamber, which would soon be behind the ReefMat and Skimmer, would have been very awkward to say the least! Now, with all its tubing being previously installed, only its Controller needed to be installed. That was quickly accomplished and the unit's three cables, Leak Detector, ATO sensor, and ATO pump, were connected. ReefBeat time was next and simply followed instructions to get all up and running. As to my overall thoughts on ReefATO, I'm concerned about small white fan worms possibly colonizing its sensor surface! This happened in previous systems using a German made float sensor, which needed cleaning about every 3 - 6 months to stay functional. And yes, the sensor and fill tubing should be in the same compartment holding the return pump. But because visual access to this sensor is blocked by the ReefMat and Skimmer/bubble sponge, visually checking this area/sensor in this 250-liter unit is near to impossible! Otherwise, I'm impressed with the unit's engineering.
Shortly after completing the ATO task, my afternoon client arrived. Feeling a little disconcerted, simply said we would move on to his reason for the visit and I would leave the water noise for more research on the web later in the day.
As to his visit, its purpose came about many weeks back when visiting my office to see the original stack of Red Sea equipment that arrived only days earlier. His main interest was in the ReefWave pumps, as he was thinking of purchasing two for his 150-gallon reef aquarium to create a tidal system. When I explained that ReefWave pumps did not have that capability, we, at that time, thought simple plug-in timers may be the answer. Because of this possibility, I then contacted Red Sea Customer Service and asked about this aspect. They quickly replied and said they have never tried that, but with short power losses, the functions saved should resume when power is reapplied. They also added, since there is no connection to ReefBeat, the only functions available would then be flow direction, wave mode, and wave intensity. Which in our opinion, was adequate enough to go ahead with this experiment. Nothing ventured, nothing gained! Therefore, at that time, my next step was the purchase of a digital timer and selected a unit having two, three prong outlets that are individually controlled (Dewenwils).
Knowing this meeting was soon to come about, I had programed the timer several days ago with what I called an AM and PM schedule - Left AM outlet would come on at 00:10 and go off at 11:50, and right PM outlet would come on at 12:10 and go off at 11:50. That provided a 20 minute off period between run schedules. There would still be some water moving in the aquarium during their off-time frames as the return pump supplied a 'Y' divided return to the upper water surface 24/7.
Since it was already midafternoon, plugged in the right ReefWave, which lit up its controller and initially set available functions as desired. Since it was then running, I readjusted its position/flow intensity to suit the needs of what will be in the near future, top areas of the aquarium having various Montipora species. To do that, I used a 'weighted toy anemone,' seen in the attached photo,

The following morning, the left ReefWave was running (it turned off at exactly 11:50 AM), but was able to get its flow intensities set before the right unit turned on at 12:10 PM. Both ReefWave's are continuing to work perfectly as I write this a couple of weeks later, so I decided to stay with this tidal effect, and will also mention, have a very happy client!
I then added the biological components to begin the cycling procedure. Since the ReefMat's supply of water was not yet connected because I wanted treated system water to freely circulate without going through any filter media, I waited a day to connect its flow. Once connected to ReefBeat, it has some interesting usage facts that are collected you may find useful in on-going aquarium maintenance. And not having to remove filter socks for cleaning quite often, as I have done with past systems, is a much-improved way to go!
Returning to the noisy water situation, later that day sent a letter off to Red Sea Customer Service noting the problem. The next day, then Monday, I received an answer that solved it. Without fully repeating their entire answer, I was informed the 'Red' downflow valve is a version 4 (V4) precision adjustment unit and there are two adjustments for quieting flow noise, one going to the fully closed position, and one to the fully open position. I selected the closed fix. As to this fix, Customer Service said it may require up to '15' full clockwise turns before reaching the fully closed position. Since doing that would raise water in the rear overflow to the top of the emergency overflow pipe, and somewhat lower water level in the sump, added some previously prepared saltwater to the sump and shut off the ATO. Then actually turned the downflow valve 12 full turns clockwise until it stopped, which now had water in the overflow area flowing into the emergency overflow pipe. Then backed off the valve one quarter turn. After that, there were several 'smaller' valve adjustments, and then, water silence! And as to the water level in the overflow compartment, it was 'about' half way between the top of its regular overflow pipe opening and the top of the emergency overflow pipe opening. All 'appeared' to be running normal with no water downflow noise. Then turned the ATO back on. But will add here, over the coming days, I did notice some small water level changes in the rear overflow water level, which was probably caused by the wave action on the aquarium's water surface. But all remains quiet!
Late that afternoon, I supplied power to the DC powered Skimmer, which in turn lit up its position on the ReefRun Dual Controller. Then opened ReefBeat and followed its steps to calibrate the collection cup's two sensors and get it running to its designated 70% efficiency level for this size aquarium/skimmer. And should note, as with all skimmers I've had over the many past years, their initial operation always seemed to result in some overflowing collection cup situations! And even though this unit's manual water level control was set to wide open, and sump water level was in its labeled midpoint, I did experience one cup overflow. But ReefBeat immediately recognized it and reduced its pump outflow, quickly preventing a messy situation! So drained the cup, and to further reduce another occurrence, set ReefBeat foam wetness level to a much lower percentage. That seems to be working well, as the foam level does not go high enough to overflow into the cup, but has been a watch item this past week. But if it continues to be good over the coming days, I will increase the wetness somewhat every few days until it's back to 40 % and go from there as needed.
I then moved on to the two ReefLED 90W units. They come with three complete settings, 15K, 20K, and 23K, along with moonlight, acclimation and various other settings, all discussed in their user manual. But their software needed an update before proceeding further, but once that was accomplished, setting its functions went well. I chose the 20K setting, set the moonlight schedule, and once water quality allows, as the system was cycling, I will turn the lights back on and begin adding some fish and soft corals. Then over the coming weeks, some LPS, and then finally SPS. And once some Montipora frags are added, utilize the acclimation setting as deemed necessary at that time. And since a well-stocked reef aquarium is still several months away, its photos when the time comes, will be added to my area in the Galleries section of this website, where presently 'some' of my past and present aquariums are already shown.
As for Red Sea's printed manuals, they are quite good. But when it comes to ReefBeat, a must have Red Sea smart equipment application /tool, will say it functions 'fairly' well considering all it accomplishes. Yet, in my opinion, is 'ripe' for a comprehensive improvement! As to that, I would like top Red Sea management to consider a 'single' Red Sea video containing 'all' it's smart equipment abilities/functions! And yes, I do understand numerous and ongoing updates to a single video would be necessary because equipment/systems are constantly upgraded. But ReefBeat is the 'heart' of all 'smart' components past, present, and future, and if having subcategories for each component, so be it. In fact, I would like to see 'ReefBeat' itself, become something like a public library - one application with many compartment-like sectors with as many segments as needed to keep all that have purchased their smart equipment fully informed with 'visually' explained function procedures/choices! Lastly on this item, I want to add my thanks to all those, both from Red Sea and independent sources who have produced the currently available videos, as their efforts are much appreciated! (Maybe all could join hands in the above effort for one glorious, massive Red Sea ReefBeat application!)
Before closing, I would like to give kudos to the following companies, and the first would be Red Sea. I've had many different size and brand marine aquariums over the past fifty years. Some were acrylic units, but most were glass, and where they were large systems, the time spent incorporating various brand components into each to reach the finish line was in most cases, somewhat excessive. But when I had my first complete Red Sea system many moons ago, that all-in-one aquarium system package proved to be an excellent, well-engineered system containing high quality system components all interwoven into an excellent, very attractive unit! And besides that, over the coming years, and a couple of more Red Sea Click Here! major systems, I've also found their customer service first-rate! And yes, my past experiences with Red Sea systems have all been excellent, and because of that, have remained a Red Sea customer. (If it isn't broken, don't fix it mentality!) And since there are other brand complete systems available, I highly recommend you check them 'all' out to see what fits 'your' needs/available time to reach the finish line before selecting it.
As to a second company, one that I've had the pleasure to occasionally use some of their products for my freshwater and marine aquariums over the past several 'decades,' is CaribSea. And because this aquarium was going to have two columns of different length arching rockwork that would connect three, step-like rock shelves of different lengths, I wanted to be sure its two assembled columns would be absolutely sturdy without having to cement various sections together. After checking out several different brand aquascaping supply companies, returned to CaribSea to see if what was used in a previous marine aquarium, a 'Coraline-coated looking' rock product called LifeRock, contained enough varieties of this type rock to produce what I was wanting to accomplish in this new aquarium. What I found for my two column structures was that among LifeRock's wide assortment of different shaped rock segments for making caves, caverns, tunnels, branches, arches, etc., there were sections called base rock. And depending upon their size, some had one hole drilled through its center area, others had three holes drilled through them. Into these holes, an acrylic purple rod (sold in different lengths/you can cut to fit your needs) can be inserted. Then LifeRock arches having 'two off-center' holes drilled through each, allows for stacking them on the rod at different angles and different projecting lengths, making a completely sturdy and more open central structure for each column thereby providing better water movement past and around them! And all without the use of any cement. As for the three interconnecting shelf-like pieces, a 14-inch piece was allowed to lean on the base plate of each structure, and a middle 10-inch and a top 8-inch shelf-like piece was secured in their areas by slightly moving the base area of each column. I was 'delighted' with the completed and 'very' sturdy structure. And I should add, CaribSea Click Here! not only supplies various products for marine and freshwater hobbyists, they have also supplied products for many public aquariums and aquaculture facilities. Certainly, a company to add to your list of companies to check out when looking to aquascape your aquariums, whether marine, freshwater or even reptilian enclosures.
Hope you enjoyed reading these two 'Reviews' as much as I was delighted with the interest shown by many of my local aquarium clients from the first day I took delivery of all this Red Sea equipment! Cheers, Bob

